Endereço
304 Norte Cardinal
St. Dorchester Center, MA 02124
Horas de trabalho
Segunda-feira a sexta-feira: 7h - 19h
Fim de semana: 10:00 - 17:00
Endereço
304 Norte Cardinal
St. Dorchester Center, MA 02124
Horas de trabalho
Segunda-feira a sexta-feira: 7h - 19h
Fim de semana: 10:00 - 17:00
Struggling to get that perfect, crisp bend in your aluminum flashing? I know the feeling of watching a piece of material crack or warp, wasting both time and money.
In my years running a factory, I’ve learned that while bending aluminum flashing can be tricky, success in this task truly depends on having the right tools, using the correct techniques, and, most importantly, understanding the material you’re working with.
With a little guidance, you can achieve professional results every single time. Let’s walk through the essential questions my clients and team often ask about bending aluminum flashing, breaking down each step to ensure your next project is a success.
Starting a project for bending aluminum flashing without the right equipment is a recipe for failure. It can damage your material and lead to poor results. I’ll show you exactly what you need.
From my professional experience, you need a few core items for bending aluminum flashing effectively. The essentials are a quality tape measure, a sharp utility knife for scoring, a pair of hand seamers or pliers, and ideally, a portable bending brake for the cleanest results.
To get a professional result when bending aluminum flashing, having the right tools is not just a suggestion; it’s a requirement. In my B2B operations, precision is everything. Our clients, who are often purchasing managers for large manufacturing companies, expect parts that meet exact specifications. The same principle applies here. The quality of your tools directly impacts the quality of your bend.
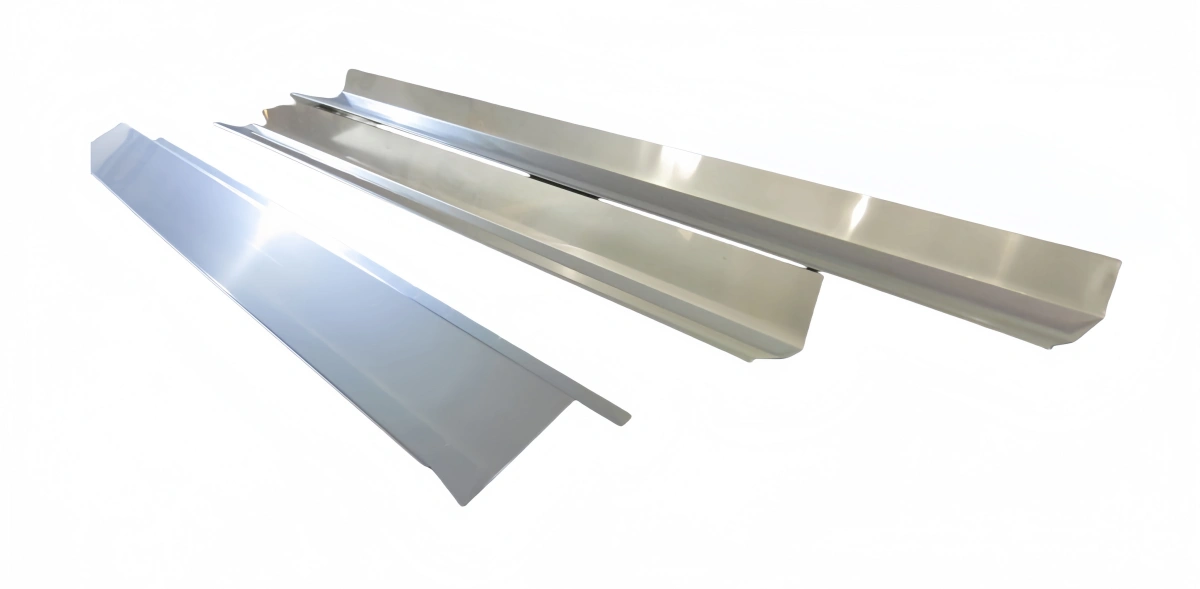
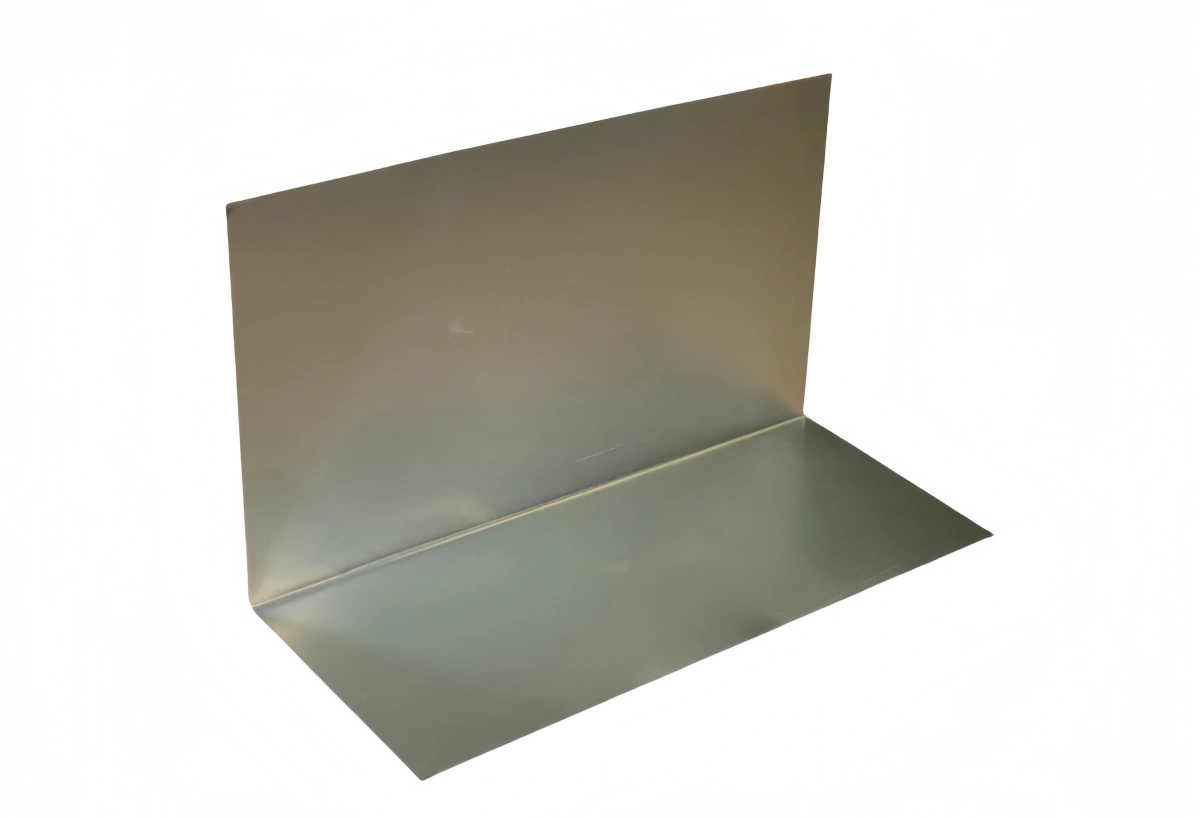
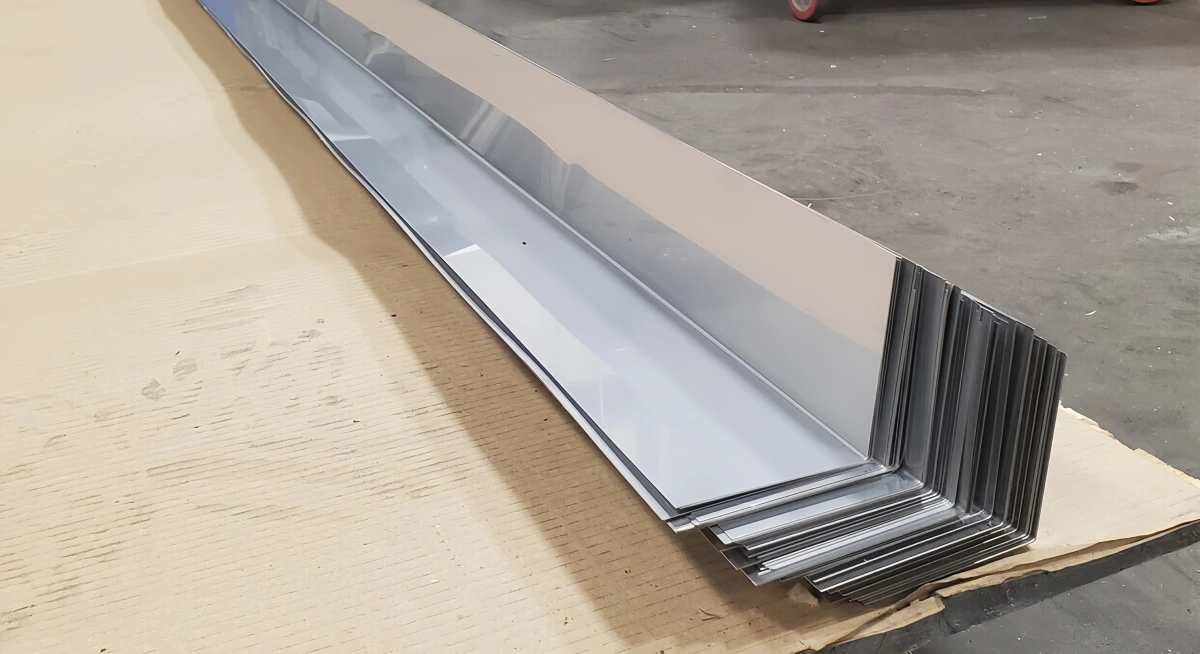
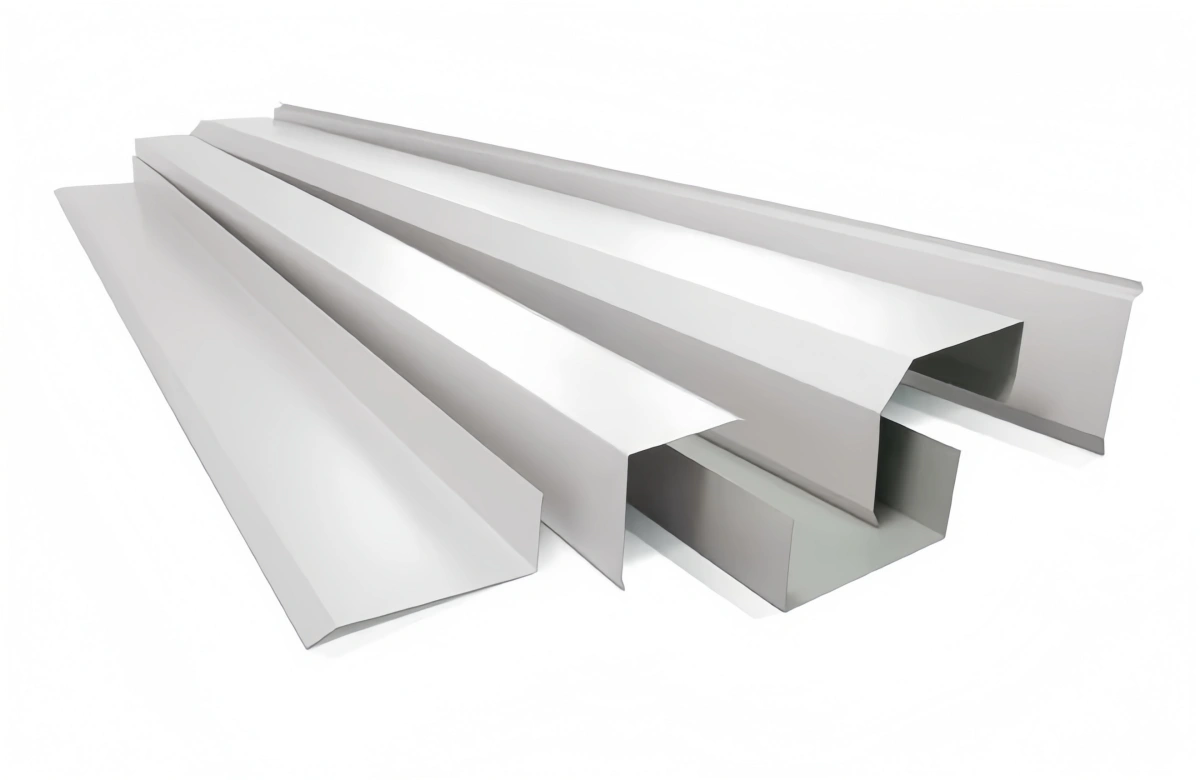
The single most effective tool for bending aluminum flashing is a bending brake. A brake is a machine that holds the metal flat and allows you to create a straight, uniform bend along a precise line. In our factory, we use large, industrial hydraulic brakes for creating complex profiles. For on-site work, a portable siding brake is the gold standard. It applies even pressure across the entire bend, which is the secret to avoiding wavy lines.
If a brake isn’t available, a few hand tools can still get the job done for simple bends.
Before any bending aluminum flashing occurs, you need precise measurements. A reliable tape measure and a square are critical. In our factory, poor measurements are a primary cause of rejected parts. Our quality control team checks dimensions at every stage. For you, measuring twice and bending once will save you from costly mistakes.
Here is a simple breakdown of the tools:
| Tool | Primary Use | My Professional Tip |
| Bending Brake | Creating clean, straight, long bends | Invest in one if you do a lot of bending aluminum flashing. It’s a game-changer. |
| Hand Seamers | Bending short lengths and making adjustments | Look for offset handles for better ergonomics and leverage. |
| Utility Knife | Scoring the bend line for a clean fold | Use a new, sharp blade for every few cuts to ensure a clean score. |
| Rubber Mallet | Tapping the bend without damaging the surface | Use gentle, even taps along the length of the bend. |
| Tape Measure/Square | Ensuring accurate and straight lines | A square is essential to ensure your bends are at the correct angle. |
So, you need to start bending aluminum flashing, but you don’t have a bending brake. You worry that you’ll end up with a ruined piece of metal. I’m here to tell you it’s entirely possible with the right method.
Yes, you absolutely can. I’ve guided many people through this process. Bending aluminum flashing without a brake involves using a sturdy straightedge, like a piece of wood, to clamp the flashing down and then carefully folding it over by hand or with hand tools.
While our factory relies on sophisticated machinery, I understand that’s not always practical. Many of our clients need to make small field modifications. The key is to create a makeshift brake. The manual method for bending aluminum flashing is perfect for these situations.
This is the most common technique for bending aluminum flashing without a dedicated tool.
This manual method for bending aluminum flashing is excellent for simple, straight bends. However, it’s important to understand its limitations.
For a purchasing manager, knowing the difference is key. If your product requires intricate and repeatable parts, you need a supplier with the right equipment. This expert guidance is crucial, whether for on-site fixes or for high-volume manufacturing that involves bending aluminum flashing.
You’ve made your attempt at bending aluminum flashing, but it looks wavy and soft, not sharp and professional. This can compromise both the look and function of your work. Let me share the secrets to that perfect, crisp line.
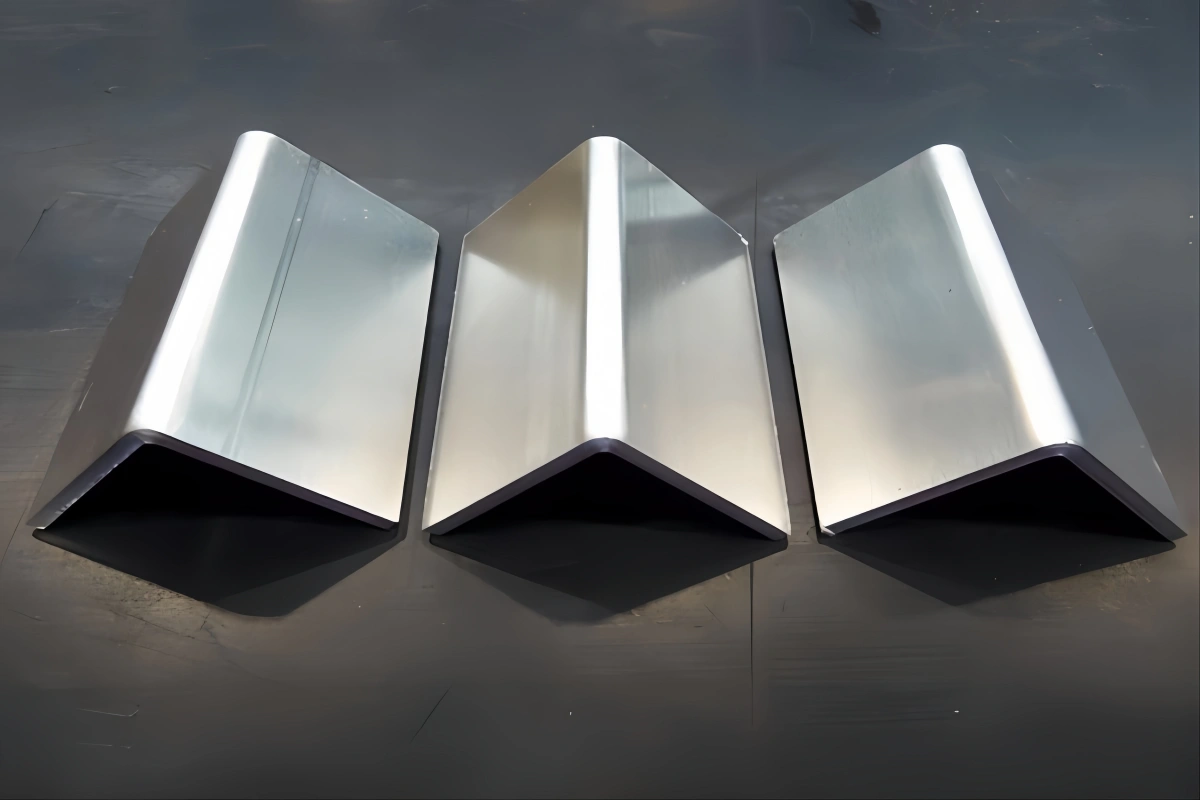
In my factory, we achieve perfectly clean bends by focusing on three things. First, we use a brake to apply uniform pressure. Second, we ensure the material is properly scored. Finally, the bend is made slowly and deliberately to prevent the metal from stretching unevenly.
Achieving a clean bend when bending aluminum flashing is a core part of quality control. For the custom aluminum products we manufacture, a poor bend can mean the entire part is out of spec and unusable for our client’s final assembly. The principles we use for high-tech parts are the same ones you can use.
The “temper,” or hardness, of the aluminum plays a huge role. A very hard temper is brittle and more likely to crack. A softer temper is more ductile and easier to bend cleanly. When a client needs a part with many tight bends, my engineering team always recommends a specific alloy and temper, like 3003-H14, known for its excellent formability.
Beyond the tools, your technique is what separates a clean bend from a sloppy one.
Here are some common defects I see in bending aluminum flashing and how to fix them:
| Defect | Appearance | Common Cause | How We Solve It |
| Wavy Bend | The bend line is not a straight, crisp edge. | Uneven pressure during the bend; not using a brake. | Use a brake or a securely clamped straightedge. |
| Cracking | A visible fracture on the outside of the bend. | Bend radius is too tight; material is too hard. | Increase the bend radius; use a softer temper aluminum. |
| “Orange Peel” | A rough, textured surface on the bend. | Over-bending or stretching the material too much. | Bend slowly and avoid bending past the desired angle. |
For my clients, preventing these defects is non-negotiable. Our process controls ensure that every bend on every part is clean and meets the design requirements.
There’s nothing more frustrating in the process of bending aluminum flashing than getting to the final step, only to have the aluminum crack along the bend. That piece is now scrap. I’ll explain why this happens and how to prevent it.
From an engineering standpoint, I can tell you that cracking when bending aluminum flashing happens for two main reasons: the bend is too sharp, or the material is not suitable for the bend. To prevent it, you must always use a proper bend radius and choose the right aluminum alloy.
This cracking issue in bending aluminum flashing is one of the most common quality concerns we address. A purchasing manager cannot afford a production halt because a supplier’s parts are cracking. Preventing cracking is a science. When you bend metal, the outside of the bend stretches. If you stretch it too much, it will crack.
When you’re bending aluminum flashing, you cannot bend it to a perfectly sharp 90-degree corner. Every bend has a “bend radius”—the curve on the inside of the bend. Trying to create a “zero radius” bend guarantees a crack. A larger bend radius gives the material more room to stretch. A bend radius of 1 to 3 times the material’s thickness is a safe rule.
This is where a supplier’s expertise becomes invaluable for tasks like bending aluminum flashing. Different aluminum alloys have vastly different properties. For projects involving significant bending, we would never use a high-strength, low-formability alloy. Instead, we would guide the client toward an alloy known for excellent bending characteristics.
Here’s a simplified chart to illustrate the point:
| Aluminum Alloy Series | General Bendability | Caso de utilização comum |
| 1xxx Series | Excelente | Electrical applications, where purity is key. |
| 3xxx Series | Excelente | Cookware, general sheet metal work, flashing. |
| 5xxx Series | Muito bom | Marine applications, automotive panels. |
| 6xxx Series | Razoável a bom | Structural components, requires larger bend radius. |
| 7xxx Series | Pobres | Aerospace, high-strength applications (not for bending). |
As a purchasing manager, you need a supplier who is a metallurgical expert. When you send us a drawing, my team analyzes it to ensure the material is appropriate. This proactive approach prevents costly failures before production even begins.
Mastering the art of bending aluminum flashing is achievable. With the right tools, a focus on clean technique, and respect for the material’s limits, you can produce professional, durable results in all your bending aluminum flashing projects.thumb_upthumb_down